On my main server, the drives are in ZFS pools which are running in RAIDZ 1 – this means I can tolerate losing one drive in each pool. But RAID is not a backup solution – and I wanted a system that would let me back up my VMs, my pools, and files from my other machines on the network.
Hardware
I was going for cost efficiency here. I happened to have two 4TB 3.5″ WD drives from one of my old machines that was previously serving my media and files. These did not go into the new server because it uses 2.5″ drives.
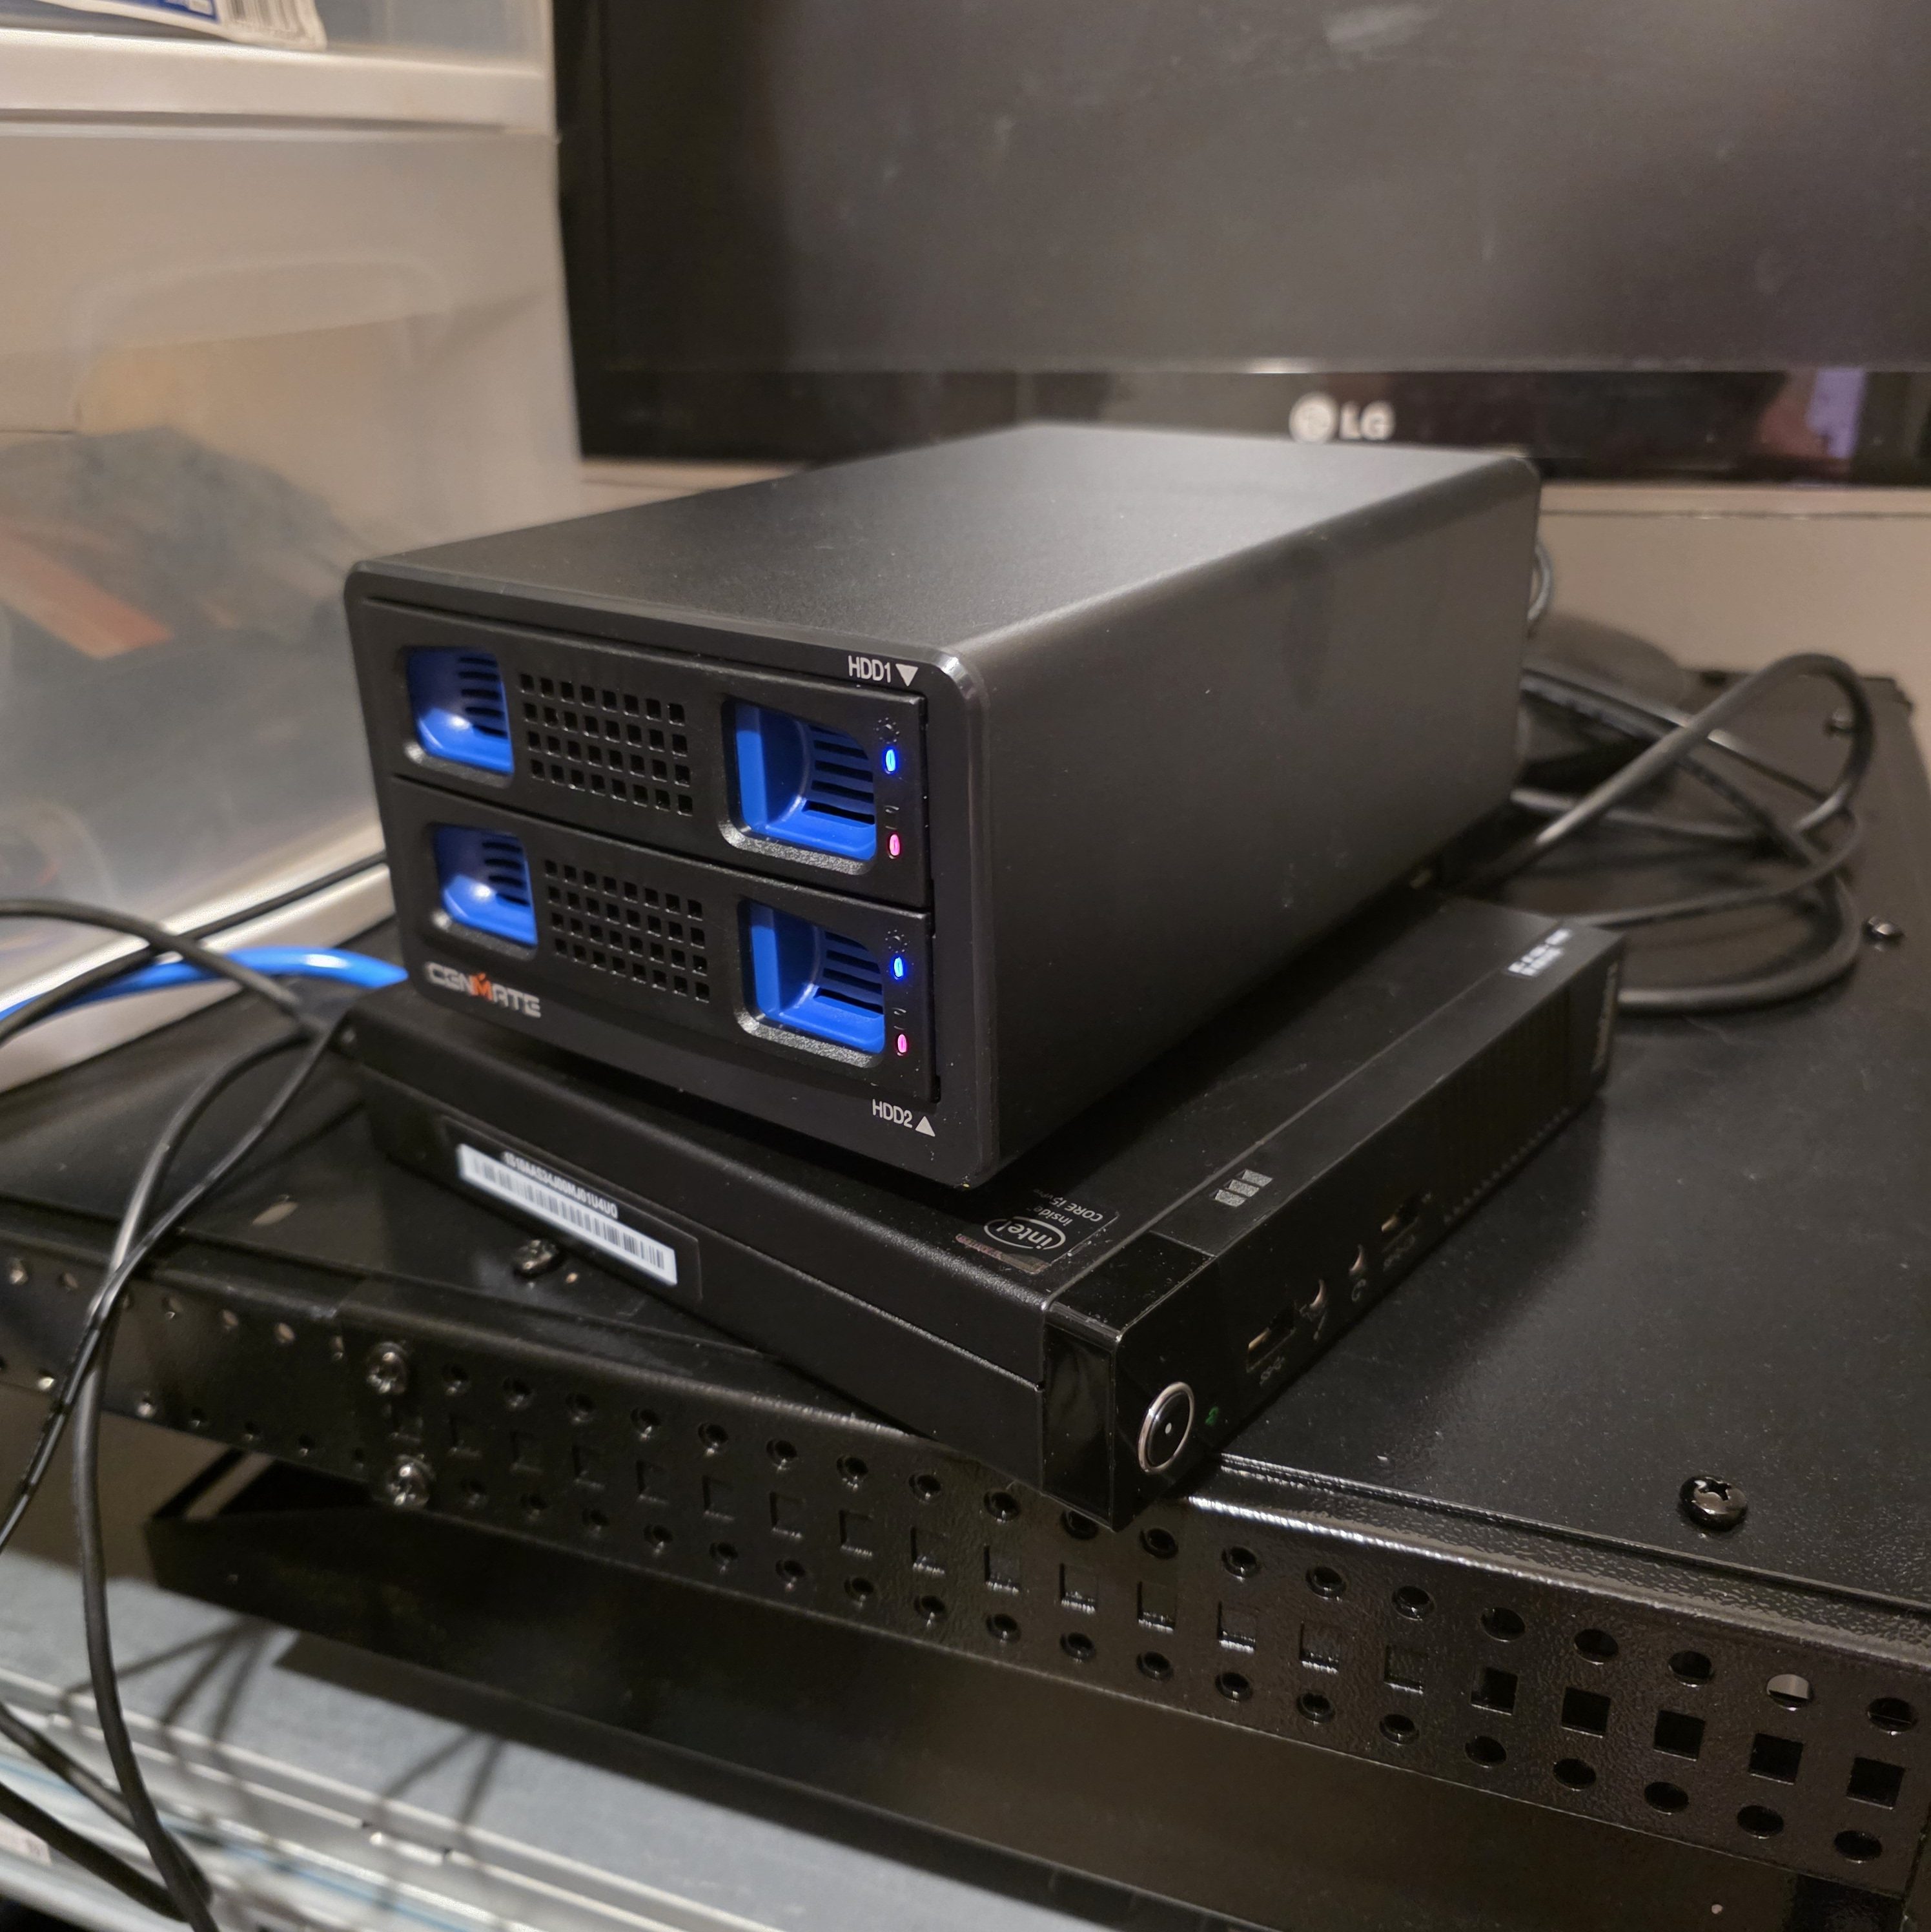
I decided the cheapest thing to do was get an external drive enclosure (USB) and connect it to some cheap compute that was not on the server for redundancy. Speed would be very limited with the USB interface, but since this is a backup solution, speed was not super important.
I sourced the following:
- Lenovo ThinkCentre M93p with an i5-4570T, 8GB RAM, and a 128GB SSD including power adapter for around $50.
- CENMATE Dual Hard Drive Enclosure https://www.amazon.com/dp/B0DD3GSZBP
- Installed the two 4TB drives I already had in the enclosure
I assembled this all together for a test and the drives were recognized and everything worked as expected.
Software
I decided to use Proxmox Backup Server since I was already running Proxmox VE on the main server. I figured that since most of the other backups I would be taking were of files, the Debian basis of PBS would let me just run the other backups using various Samba shares and cron jobs.
Proxmox Backup Server – Open-Source Enterprise Backup Solution
PBS can, like Proxmox VE, can run on a community license with no cost. You do have to configure the repos to receive updates, which I will cover later.
Install and Config
Downloading and installing PBS is very simple, just like Proxmox. Download the ISO, flash it to a USB stick, and boot the installer. There was nothing noteworthy here – just install on the whole 128GB SSD on the little Lenovo and I was soon prompted to go to my browser and set up using the web interface.
Switch to Community Repos
When you first get in to PBS via the web interface, it will have the warning messages that you do not have a license. Unfortunately unlike Proxmox VE, they do not have a “Repositories” configuration section in the UI. I followed this guide to switch my repos to the community version and it worked as expected.
How to Switch Proxmox Backup Server 4.x to the Community No-Subscription Repository – Nuface Blog
Basic Backup Server Config
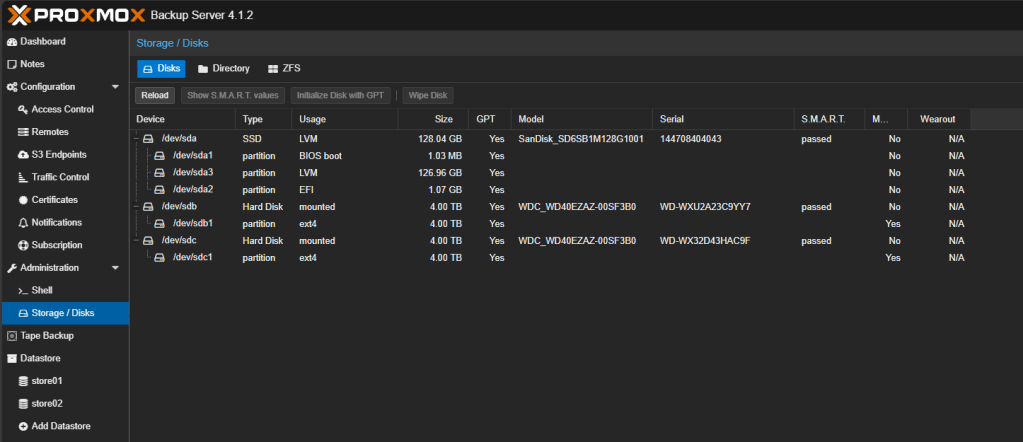
After getting into PBS for the first time, I saw that my USB drives were already visible in the Storage/Disks section. I ran fdisk commands in the terminal to format them the way I wanted and could see the partitions afterwards:
You will need to ensure that your drives mount on boot as you want them to by editing /etc/fstab. But once you have the mounts all configured, you can go do Datastore -> Add Datastore
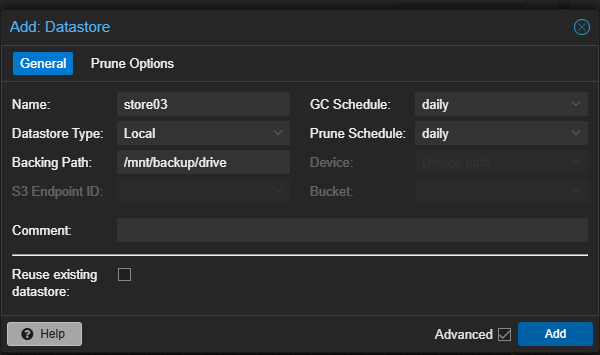
Backing path is going to be the mounted drive directory that you want PBS to use for that datastore. In my case, since I had two drives, I created two datastores with the appropriate backing paths. I did not change any of the other settings and left them as default.
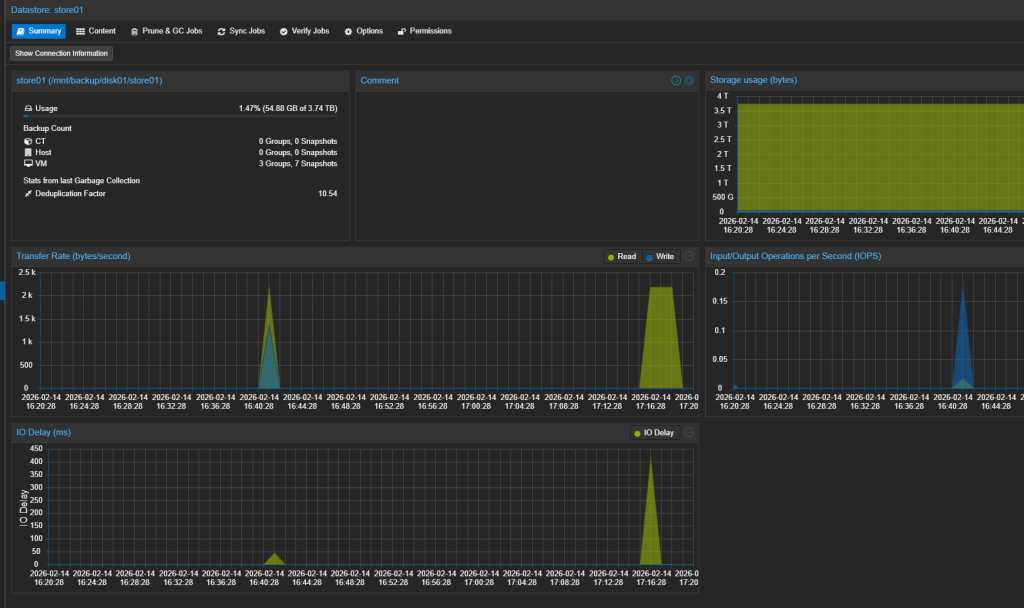
Here’s an example of what the datastore looks like after having been up for a while:
Connecting PBS to your Proxmox VE Host
PBS and Proxmox VE have good integration – the idea is your PBS server should just act like a regular backup location in your main Proxmox VE instance.
Most of this can be done in the UI of the Proxmox VE instance as described in Proxmox’s own documentation: Proxmox VE Integration — Proxmox Backup 4.1.2-1 documentation
Add the PBS server as a storage location under Datacenter -> Storage. You will see it already has Proxmox Backup Server as an option under Add:
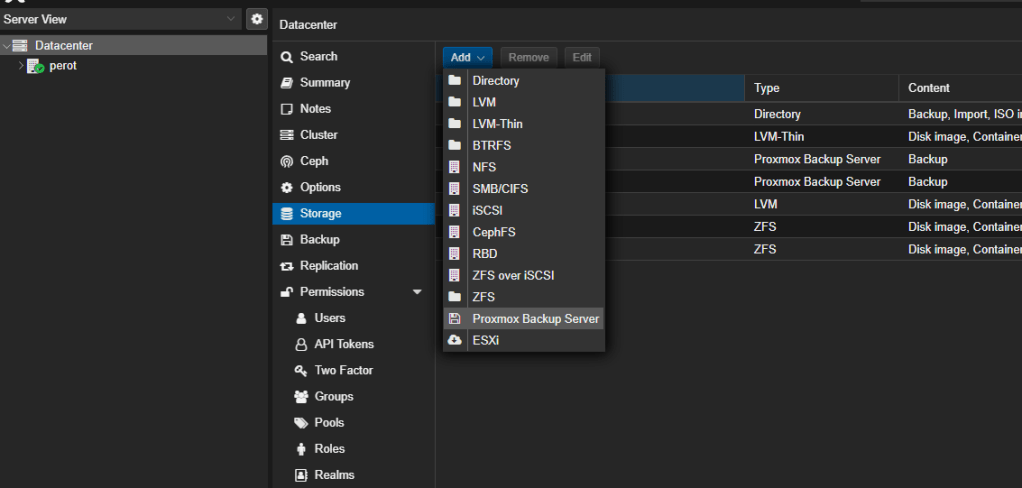
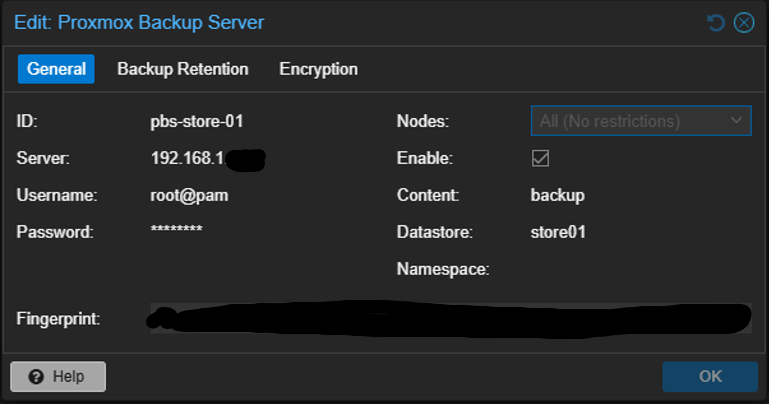
Once you click Add basically all you need is the IP of your PBS machine, the username (in proxmox format e.g. root@pam) and the password. The “Datastore” option will be the name of the datastore you created on the PBS machine.
If you are using a self-signed certificate for communication between the two (as I was) you need to generate a cert fingerprint and copy that into the Proxmox Backup Server add dialog when you get there from Datacenter -> Storage.
proxmox-backup-manager cert info | grep Fingerprint
Copy this fingerprint into the dialog when adding the PBS server to Proxmox VE:
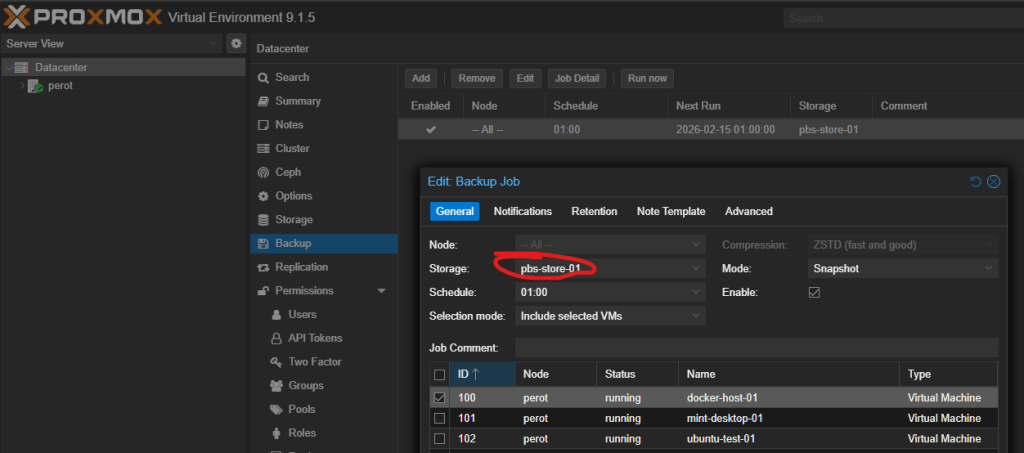
From there, you can start making backups either on demand or on a schedule from Proxmox VE and they will get picked up by PBS. For example, I have this one VM backing up every day to the PBS machine (set in the storage option of the Datacenter -> Backup screen):
Next Steps
From here, I plan to write some shell scripts and manage samba shares to copy over files and ZFS pools for backup.
I would also like to physically mount this little Lenovo machine nicely into my rack with the R730 – so I am considering doing some 3D printing to make a little rack shelf for it or something.
I will cover all that in other articles.
