One of my first goals was to re-implement Jellyfin for streaming media in my home. Since my setup is designed to utilize containers, I used the already available Jellyfin Docker image and then configured from there.
Being a novice with Docker, I learned a lot along the way about how resources get passed through to containers. A specific challenge was getting the hardware transcoding to work with an NVIDIA RTX-2060 Super that I installed in the R730.
Docker Compose Deployment
I am using Docker Compose which allows you to specify various settings when starting the container in a YAML file. This makes it easier to keep your various start command needs in a nice format that is portable.
Jellyfin has a guide to deploying their official image, along with an example of the compose.yaml file here
I chose to write my compose file to a github repo so that I can maintain it in vscode and then deploy to the guest OS with a git command. To do this, I first made a directory where my repo can be cloned as well as some other directories that I will pass to the container as volumes which will persist the Jellyfin settings outside of the container. In my home directory I created config and cache (trying to just use the example compose file as a guide).

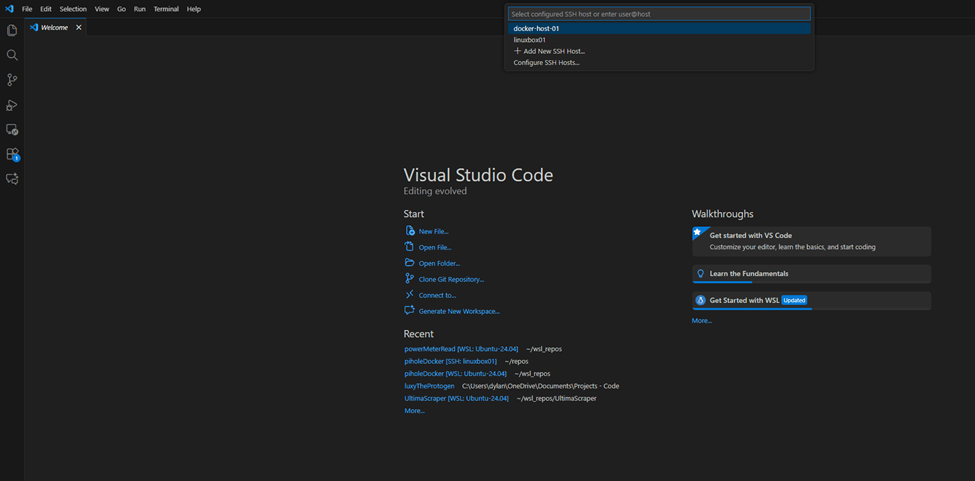
Using the connect to remote host feature in VSCode, I can clone my repo directly to the guest VM that I want to run my containers on:
My final docker-compose.yaml file is below. Note that there are further steps we need to take before running docker compose up , and I will walk through all of that. But the end result of the file working now is this:
services:
  jellyfin:
    image: jellyfin/jellyfin
    container_name: jellyfin
    # Optional - specify the uid and gid you would like Jellyfin to use instead of root
    #user: uid:gid
    environment:
      - NVIDIA_VISIBLE_DEVICES=all
    ports:
      - 8096:8096/tcp
      - 7359:7359/udp
    devices:
      - /dev/nvidia0:/dev/nvidia0  # Optional - enables hardware acceleration for NVIDIA GPUs
      - /dev/nvidiactl:/dev/nvidiactl
      - /dev/nvidia-uvm:/dev/nvidia-uvm
    runtime: nvidia  # Optional - enables hardware acceleration for NVIDIA GPUs
    volumes:
      - /home/docker/jellyfin/config:/config
      - /home/docker/jellyfin/cache:/cache
      - type: bind
        source: /mnt/zfs-datastore-01/Media
        target: /media
      #- type: bind
      #  source: /path/to/media2
      #  target: /media2
      #  read_only: true
      # Optional - extra fonts to be used during transcoding with subtitle burn-in
      #- type: bind
      #  source: /path/to/fonts
      #  target: /usr/local/share/fonts/custom
      #  read_only: true
    restart: 'unless-stopped'
    # Optional - alternative address used for autodiscovery
    #environment:
    #  - JELLYFIN_PublishedServerUrl=http://example.com
    # Optional - may be necessary for docker healthcheck to pass if running in host network mode
    #extra_hosts:
    #  - 'host.docker.internal:host-gateway'
Saving the file puts it directly into the guest since I am connected directly to it.
Media Share Folder Setup
I wanted to access an already existing zfs pool to store/retrieve all the media. This zfs pool is on the proxmox host and I need to share it with the guest VM that is running my docker containers.
First, create a directory mapping in Proxmox which will take some directory from the host and make it available to other guests in the proxmox UI. Go to Datacenter -> Directory Mappings and add like so:

Now the directory can be added as “hardware” to the guest vm. Under the guest go to hardware -> Add -> Virtiofs

Then configure the virtiofs as a drive (note – after troubleshooting I DID end up enabling xattr support and POSIX ACLs, the screenshot does not show this).

Reboot the VM.
Now mount this newly available “drive” in the guest – make a directory in /mnt/ where it should go. In my case:
sudo mkdir /mnt/zfs-datastore-01
sudo mount -t virtiofs zfs-datastore-01 /mnt/zfs-datastore-01
Don’t forget if you want this to mount automatically on reboot, you need to edit /etc/fstab and add the mount command at the end of the file:

I ran into issues after mounting with accessing the share. Using my non-root user, I was getting “access denied” when attempting to cd into the shared directory. This led me down a path of trying to understand how permissions were passed from the host to the guest using virtiofs.
Permissions from Host to Guest in VirtioFS
Trying to understand the access denied issues, I was struggling with how exactly the guest vm was able to check permissions against the host. This reddit post helped me:How do virtiofs permissions work? : r/kvm
As it turns out, the permissions are checked between host and guest using UID (user id) and/or GID (group id). The actual group or user names do not matter. Essentially, the UID of the guest user is passed to the host, and the host must have a UID of the same value. That user must have the access permissions to the fileshare. Since a lot of proxmox stuff is done with root, by default the access on the guest will not work unless you are using root on the guest.
I have a non-root user on the proxmox host, which was UID 1000, and my first user on the guest VM was also UID 1000. You can check your UID with the id command.
So all I had to do was modify the access control list to give UID 1000 (on the host) access to the zfs pool directory. This was run on the proxmox host:
setfacl -R -m u:1000:rwx /zfs-datastore-01After that command, I was able to retrieve the contents of the share from the guest:

Starting Container
With my docker-compose.yaml file complete, and my user able to access the directory for my media, I started the container by navigating to the directory with the compose file and running
docker compose up I ran into the following “permission denied while trying to connect to the Docker daemon socket”

I forgot that I also had to ensure that my user was added to the docker group. I made the group, and then added my user to that group:
newgrp docker

sudo usermod -aG docker $USER
After this, the container started successfully and stored all the configs in the persistent volumes given in the yaml.
Hardware Transcoding Setup
The next challenge was to get this container and the guest vm to see and utilize a GPU installed on the bare server.
I installed the GPU in the server beforehand, and documented that here.
First, I had to use the PCI passthrough feature of Proxmox, which has good documentation here: PCI Passthrough – Proxmox VE
Following the steps on this document was a requirement to ensure that the server has all the needed settings enabled and that the GPU has its own dedicated IOMMU group. Once that is complete and validated, I mapped the PCI device in the proxmox UI.
In datacenter -> Resource Mappings I created a PCI mapping to the IOMMU group of the GPU:

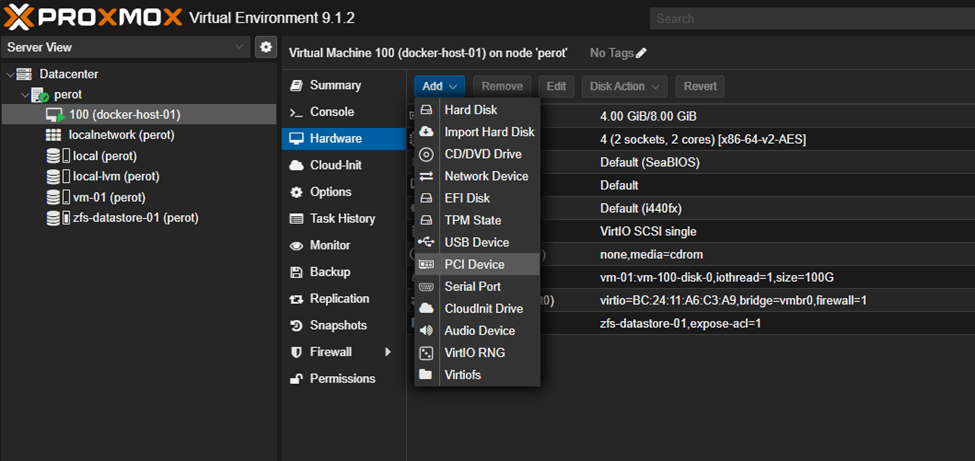
Then on the guest, under “hardware”, I added the newly mapped resource:

After a reboot of the vm, I was able to see the device on the guest vm:
lspci -nn | grep -Ei "3d|display|vga"
After that, it was just the annoying matter of getting all the drivers for the GPU installed on the guest. There were also additional packages needed for giving the GPU to a container. This part would have been a little easier if not using a container, but I got it working eventually.
Followed this guide to installing the Nvidia drivers on ubuntu:
NVIDIA drivers installation – Ubuntu Server documentation
Then I followed these instructions to enable what was needed for hardware acceleration to be used in the containerized instance:
Finally, I had to follow these steps to install the Nvidia container toolkit on top of the Nvidia drivers to get it to work with docker:
Installing the NVIDIA Container Toolkit — NVIDIA Container Toolkit
After doing all this you will definitely need to reboot the VM, as I did multiple times.
Upon restarting the container, I got an error:
✘ Container jellyfin Error response from daemon: unknown or invalid runtime name: nvidia
Basically, it turned out the runtime had to be explicitly shown to docker. I created a docker daemon json config (did not exist by default)
sudo touch /etc/docker/daemon.json And pasted this into the file:
{
    "runtimes":{
        "nvidia":{
            "path":"/usr/bin/nvidia-container-runtime",
            "runtimeArgs":[

            ]
        }
    }
}
After another reboot, I was able to start the container successfully.
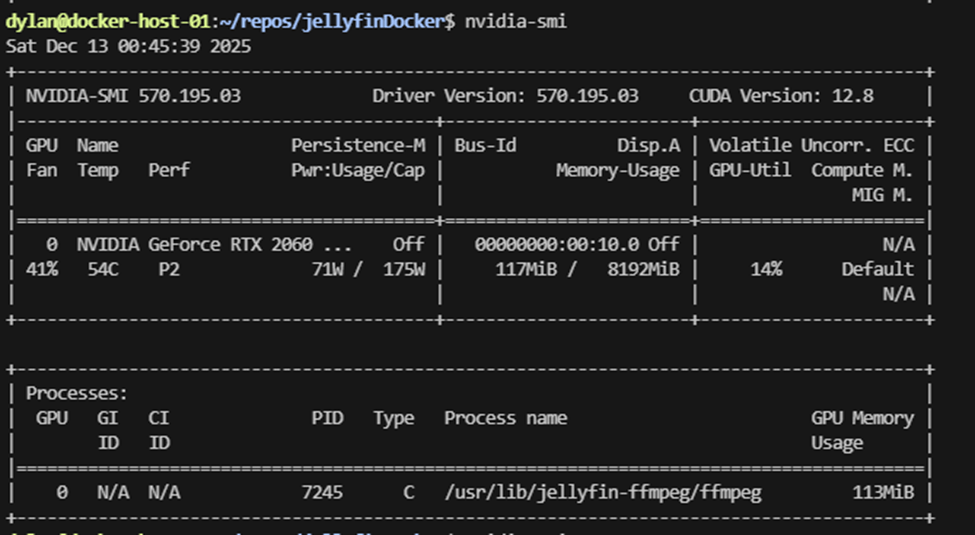
I enabled hardware acceleration in Jellyfin in the dashboard under Playback -> Transcoding, and enabling Nvidia NVEMC as the transcoder.
Loading up a video in Jellyfin, I was able to see the process using the GPU by running nvidia-smi